
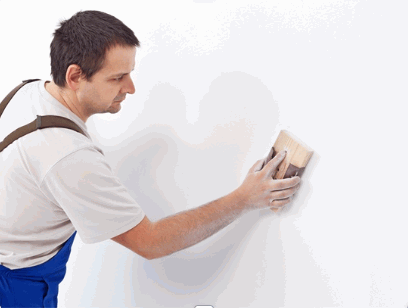
Polishing plaster can take your walls or ceilings to a whole new level. It enhances their appeal and increases their durability. To achieve a professional finish, you must use the right tools and follow the correct techniques.
First, make sure the plaster has fully cured. This could be two to three weeks, depending on humidity and temperature. Then, prepare your materials. Collect sandpaper in varying grits, from coarse to fine. Also, get a pole sander or sanding block. Clean the plaster with a damp cloth or sponge.
Start sanding with the coarser sandpaper (100-120 grit). Use circular motions across the entire surface. When finished, switch to finer grits (200-220) for a smoother finish.
Now, polish with compounds or pastes. These have abrasive properties that refine the surface and bring out its natural shine. Rub the compound into the plaster using circular motions.
Lastly, apply a finishing wax or polish for an extra shine. This also adds a protective layer against everyday wear and tear.
Discover: When Can You Paint New Plaster
Why Is It Important To Polish Plaster?
Polishing plaster is a must for a flawless finish and a better look. It smoothes out the imperfections, creating a sleek look. Without it, even the best craftsmanship may be ruined by visible flaws.
Plus, polishing protects the plaster from damage and wear. It closes the plaster’s pores, making it more resistant to moisture, stains, and dirt. This increases its lifespan and makes cleaning easier.
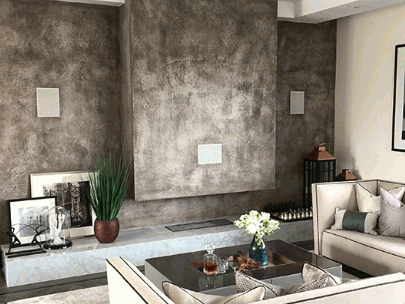
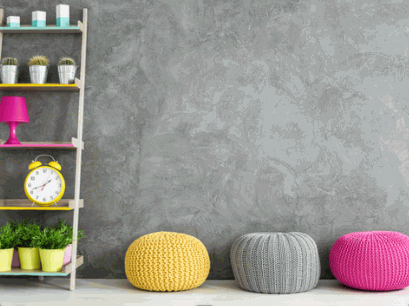
Also, polished plaster adds depth & dimension to any space. Its light-reflective properties turn a dull space into a luminous canvas that plays with light. The smoothness enhances the perception of texture, perfect for luxurious interiors.
Tools And Materials Needed For Polishing Plaster
Polishing plaster needs special tools and materials to have a perfect finish. Here’s what you’ll need:
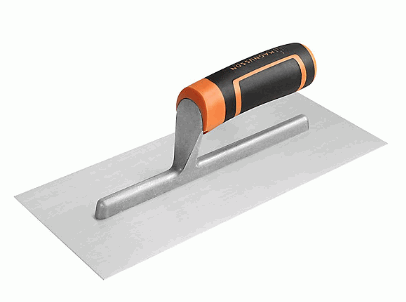
- Trowel – Mainly for plaster spreading and smoothing.
- Sandpaper – For sanding rough parts before polishing.
- Polishing compound – For the plaster to get a shine and luster.
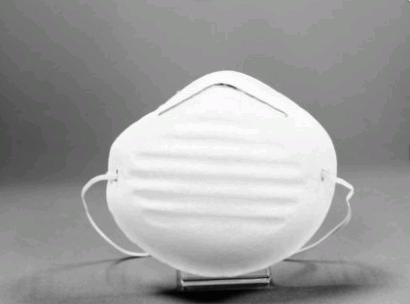
- Dust mask – To protect from inhaling dust during sanding.
But, there are more details to note. Polishing plaster is a careful job, which needs exactness and patience. It is essential to use proper techniques and follow instructions for the desired outcome.
Remember, with the right tools, techniques, and creativity, you can have amazing polished plaster surfaces that will leave everyone speechless.
Step 1: Preparing The Surface For Polishing
Prepare the surface for polishing by ensuring it’s in the best condition. This requires a few steps.
| 1. Clean | Use a soft cloth or sponge with a mild detergent and water solution to scrub away any dirt, dust, or debris. Rinse off all residue. |
| 2. Repair | Inspect the plaster for any cracks, chips, or damages. Use a patching compound or filler to fix them. Sand the repaired areas until they are level with the surface. |
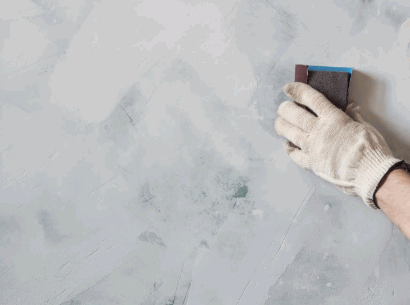
| 3. Sanding | Sand the plaster with coarse-grit sandpaper (80-120 grit) and work your way up to finer-grit sandpaper (220-400 grit). This will make the surface smooth and even. |
Safety: Wear protective gloves and goggles while using chemicals or power tools.
Tip: Plaster takes time to dry—be patient before starting the polishing process!
Step 2: Choosing The Right Polishing Method
To get a perfect finish for your plaster, selecting the ideal polishing method is essential. Here’s a basic 3-step guide for making an informed decision:
- Examine the state of your plaster: Before choosing a polishing method, carefully look at your plaster’s current state. Note down any cracks, uneven surfaces, or blemishes that need to be dealt with. This will decide which method works best for your situation.
- Think about the type of plaster: Different kinds of plaster demand different polishing approaches. Whether it’s lime plaster, gypsum plaster, or cement-based plaster, each material has its own distinct traits and needs particular strategies to get the best results. Research and understand the features of your plaster to pick the most suitable approach.
- Evaluate accessible polishing methods: There are many techniques available for polishing plaster, such as wet sanding, using abrasive chemicals, or utilizing specialized tools like power polishers or rotary buffers. Consider factors like simplicity of use, efficiency in leveling out flaws, and compatibility with your chosen plaster type. Select a method that coordinates with your skill level and project requirements.
Besides, it’s worth noting that when selecting a polishing method for your plaster, getting advice from experts or knowledgeable people can give valuable insights and make sure you make the right selection.
Fun Fact: Homebuilding & Renovating Magazine suggests wet sanding is usually advised for getting a smooth finish on both gypsum and lime plasters.
Step 3: Polishing The Plaster
Achieving a smooth, flawless finish on plaster requires a careful polishing process. Here’s how it’s done:
- Prepare the surface. Use a damp cloth to remove any dust or debris before polishing.
- Start with coarse sandpaper. Use 120-grit sandpaper in circular motions for an even finish.
- Progress to finer sandpaper. Repeat the process with 220-grit sandpaper to further refine the texture.
- Apply a polishing compound. Use a lint-free cloth to rub in a small amount of compound.
- Buffing time. Attach a buffing pad or cloth to a buffer or drill. Move across the surface in overlapping, circular motions.
- Final touch. Wipe away the residue with a microfiber cloth for that perfect finish.
Practice makes perfect with polishing plaster.
Step 4: Finishing Touches
- Sand the plaster surface to smooth out any imperfections.
- Clean it with a damp cloth to remove dust and debris.
- Apply a sealing coat with a brush or roller to protect it.
- Buff the sealed plaster surface with a cloth or buffing pad in small circular motions to bring out its shine.
- Check for any touch-ups and use sandpaper or abrasive pads to address any areas.
- For finishing touches, add desired decorative elements such as accents or trim.
- Pay attention to detail to achieve an impeccable finish.
Following these steps will make sure your polished plaster looks amazing and lasts over time.
Tips And Tricks For Achieving A Professional Finish
Polishing plaster to a professional finish requires the right tips and tricks. Here are five key points to remember:
- Get the surface ready. Clean, dry, and remove debris with a brush or vacuum. Fill in any cracks with a suitable filler.
- Use the right tools. High-quality polishing tools like sandpaper or a rubbing stone will give smooth results. Try different grits of sandpaper: start with coarser and move to finer.
- Apply the polish. Put a little on the surface and spread it evenly with a cloth or sponge. Rub in circles for an even finish. Allow dry time before the next step.
- Buff the surface. Use a soft cloth or buffing pad to buff the plaster and create shine. Keep buffing until you get the desired level of shine.
- Protect your work. Apply a wax or sealant to protect the plaster and make it last. Follow the manufacturer’s instructions for proper application and maintenance.
Plus, water-based polishes are better for health and the environment compared to solvent-based ones. And, drying times between each step are important for a smooth finish.
Now that you know the tricks for professional polished plaster, take action! Transform your space with these techniques and add life and elegance to your interiors! Start practicing and see the results.
Conclusion
Polishing plaster is a must to get that perfect look. Follow the right steps and use the right tools for a flawless finish.
First, make sure the plaster is dry. Moisture can mess up the surface. Sand it gently with a fine-grit sandpaper. This removes imperfections and creates an even surface.
Next, use a high-quality polish designed for plaster. Choose liquid or paste – whichever you prefer. Apply the polish with a soft cloth or sponge, in circles.
Allow the polish to dry as instructed by the manufacturer. Don’t touch it while it’s drying – that can lead to an uneven finish.
Lastly, buff the surface with a clean cloth, in circles. This brings out the natural shine and smoothness. Be patient – this step requires attention to detail.
Polishing plaster is an art! Transform your projects with it. Experience the satisfaction of creating a stunning finish. Let your creativity shine!