
To fix plaster wall holes effectively, understanding what plaster wall holes are is crucial. In this introduction, we provide a brief explanation of plaster wall holes. We delve into the intricacies of these holes, exploring the underlying causes and common occurrences. By gaining this knowledge, you will be better equipped to tackle the sub-sections that offer solutions for fixing plaster wall holes.
A Brief Explanation Of What Plaster Wall Holes Are
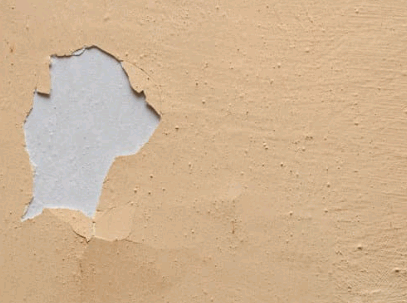
Plaster wall holes are a common sight. They can be caused by things like accidental damage, picture or fixture removal, or even natural settling of the building. Sizes vary from small pinholes to larger gaps.
To fix plaster wall holes, start by cleaning the area. This helps the patch material stick and keeps debris out. Fill the hole with a suitable filler or spackling compound. Apply multiple thin layers instead of one thick one.
A unique detail is that you may need to sand between layers. This makes the repair blend in with the wall surface. Put a primer on before painting for even color and durability.
Pro Tip: For an even better result, use a self-adhesive mesh patch over bigger holes before applying filler. This strengthens the repair and stops future cracking or crumbling.
Tools And Materials Needed
To fix a plaster wall hole with the necessary tools and materials, this section dives into what you’ll require. The sub-sections include a comprehensive list of tools needed for the job and a list of materials needed for the job.
Check out: How To Polish Plaster
List Of Tools Needed For The Job
To be a pro at any job, you need a range of tools! Making sure you’ve got the right ones is essential.
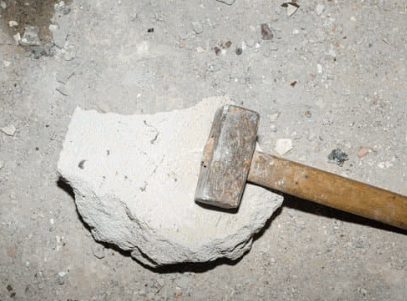
- Hammer: Driving nails, fitting parts & taking out screws or nails.
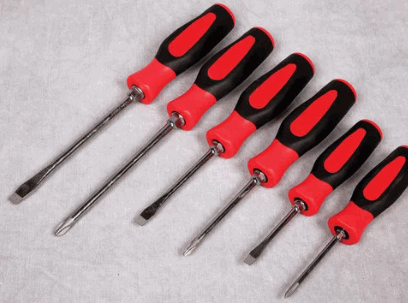
- Screwdriver set: Tightening & loosening screws of various sizes.
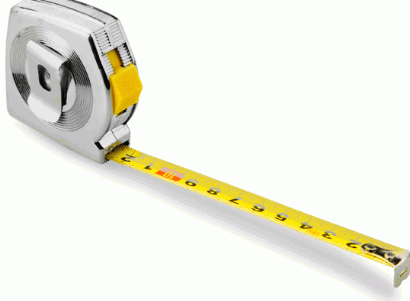
- Tape measure: Accurate measurements during construction or installation.
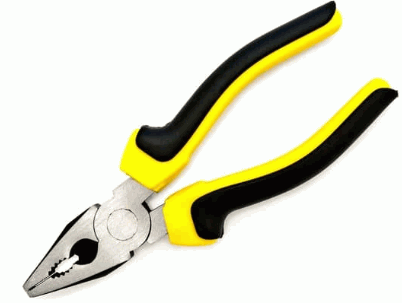
- Pliers: Gripping, bending, cutting wires & holding objects securely.
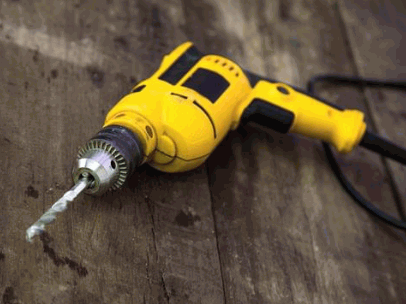
- Power drill: Drilling holes & driving screws quickly & easily.
Plus, you’ll need other tools like a level, utility knife & adjustable wrench. Don’t forget safety gear like gloves & goggles – safety comes first!
Knowledge of the job’s details is key. Refer to reliable sources or get advice from pros in the field for the best info.
Here’s a bonus: According to Home Depot, the right tools make work easier & guarantee quality results!
List Of Materials Needed For The Job
Essential materials are needed for a successful job. These tools and supplies improve job efficiency and quality. Here’s what you need:
- Hammer: Hits and drives nails into surfaces.
- Screwdriver: Tightens or loosens screws.
- Tape measure: For accurate measurements.
These tools not only help but save time too. For safety, wear gloves, goggles, and a hard hat. To add to your toolkit, include a utility knife, pliers, adjustable wrenches, and a level. This gives versatility and precision. Maintain and store the materials right to use them for longer.
Fun fact: Hammers have been used for thousands of years! Ancient civilizations like Mesopotamia and Egypt used them. They’ve evolved over time and become essential for many purposes.
Preparation
To prepare for fixing plaster wall holes, address the problem areas with these sub-sections as solutions: removing loose plaster around the hole and cleaning the area around the hole. This will ensure a solid foundation for the subsequent steps in repairing the plaster wall hole.
Removing Loose Plaster Around The Hole
Follow this 4-step Guide to remove loose plaster around the hole:
- Tap the area with a hammer to identify any loose or damaged plaster. It will make a hollow sound if it’s loose.
- Carefully scrape away any loose plaster with a utility knife or chisel. Start from the edges and move towards the center.
- Use sandpaper or a sanding block to smooth out any rough edges or uneven surfaces. This will help the patching.
- Brush or vacuum cleaner to remove dust or debris. This will allow for better adhesion of the patching material and a professional-looking finish.
Remember: Don’t rush this step. It affects the quality of the repair job.
Pro Tip: Wear protective goggles and a mask before starting any repairs. Safety first when engaging in DIY projects.
Cleaning The Area Around The Hole
- Start by brushing or vacuuming debris around the hole.
- Make a mild detergent and warm water mix and dampen a cloth or sponge with it.
- Gently wipe the area and rinse with clean water to remove any residue.
- Let the area dry fully.
- Inspect the cleaned area for dirt and stains.
- If needed, clean again.
- Wear gloves and goggles for safety.
- Different materials may require different cleaning methods and solutions.
- As an example, I recently tried to repair a wall with poor adhesion of fresh paint near the hole. That showed the importance of proper cleaning.
- Cleaning the area around a hole will bring perfect results and a great finished look.
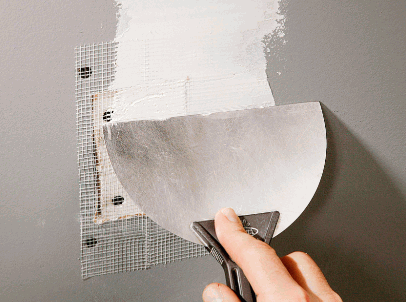
Patching The Hole
To patch the hole in your plaster wall, use a step-by-step approach. Start by filling the hole with a patching compound, and then smooth the surface of the patch. These sub-sections provide the solution to restore your wall seamlessly and eliminate any signs of damage.
Filling The Hole With A Patching Compound
For successful patching, here’s a 3-step guide:
- Prep the surface:
- Clear away dirt and debris.
- Use sandpaper or scraper on the edges of the hole.
- Wipe the surface with a damp cloth.
- Apply the compound:
- Put a bit of patching compound on a putty knife or trowel.
- Smear the compound into the hole, and press firmly.
- Smooth the surface, and feather the edges.
- Dry and sand:
- Allow drying according to product instructions.
- Once dry, sand the rough areas.
- Get rid of any dust before painting.
Remember: Different patching compounds have their own directions and drying times. Best to check the product guidelines.
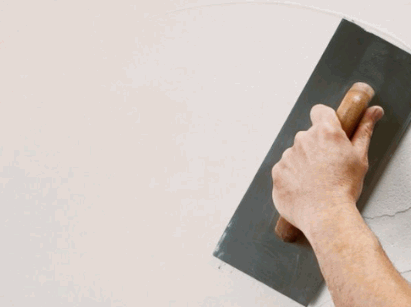
Smoothing The Surface Of The Patch
In patching, it’s not just about the fix. To get a professional finish, follow these
- Prepare the Patch: Make sure it’s secure and clear any debris.
- Sandpaper Magic: Use fine-grit sandpaper to smooth the edges.
- Apply Primer: For better adhesion and an even texture.
- Feather & Blend: Use a putty knife or trowel to transition from patch to surface.
A tip – use textured paint or wall techniques to blend imperfections. This adds depth and dimension. Master these skills to get perfect results. Don’t miss out on turning patches into works of art! Strive for flawlessness in every detail.
Sanding And Priming
To achieve a flawless plaster wall, sanding and priming play vital roles. Sanding the patched area and applying a primer to the patched area are the solutions to create a smooth and well-prepared surface. These steps ensure optimal adhesion and a polished finish for your plaster wall repairs.
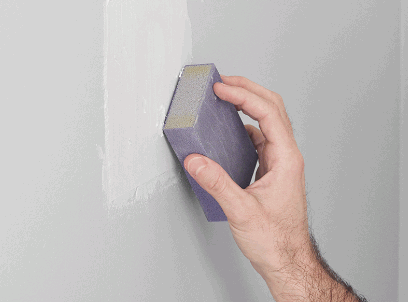
Sanding The Patched Area
Gather all materials needed for sanding the patched area. You’ll need sandpaper with various grits, from coarse to fine. A sanding block or pad will give control and stability.
Start with coarse-grit sandpaper to roughen the patch. It’ll help remove excess compounds and make an even surface. Move on to medium-grit sandpaper to flatten and smooth the patch. Lastly, use fine grit for a polished look.
Sand in circles to avoid lines or grooves. Keep consistency for seamless results. Also, consider surrounding surfaces. Feather these areas to blend for an overall cohesive look.
Sanding techniques have been used for centuries. Craftsmen used natural abrasives like crushed shells and stones. Now, synthetic sandpapers have made it easier to get impeccable finishes.
Applying A Primer To The Patched Area
- Clean the patched area to get rid of dust, dirt, and debris with a damp cloth or sponge.
- Gently sand with fine-grit paper.
- Remove sanding dust with a clean brush or cloth.
- Paint the patched area with a thin layer of primer using a roller or paintbrush.
- Wait for the primer to dry for up to 24 hours.
- Inspect and lightly sand again if necessary.
- Bear in mind the material you’re patching and the type of paint you’ll be using.
- Primer is a must for a flawless finish.
Painting And Finishing
To effectively tackle the painting and finishing process in fixing a plaster wall hole, address the key sub-sections: matching the paint color, applying the paint to the patched area, and, if necessary, applying a finish coat.
Matching The Paint Color
We’ve created a table to help find the perfect match. It shows different paint colors and their RGB values. This can be useful for matching a color or making a harmonious scheme. RGB values ensure accuracy and precision.
Lighting can affect paint colors. Glossy and matte finishes on walls can make the same color look different.
Matching paint colors have changed over time. Earlier, people had fewer options. Now, paint manufacturers provide tools and resources for an accurate match.
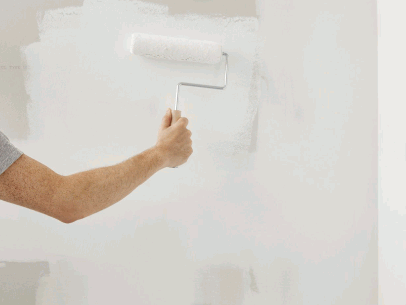
Applying The Paint To The Patched Area
- Clean the patched area with a mild soap and a soft cloth. Eliminate dust or debris that can affect paint adhesion.
- Apply a primer meant for patched areas. It will help the paint stick evenly and avoid color imperfections.
- Fine-grit sandpaper the area after the primer dries. Create a smooth surface for painting.
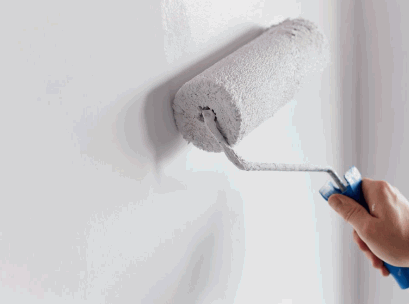
- Using a high-quality brush or roller, apply paint from the edges to the center. This will make a smooth blend with the surrounding surface.
- Allow the paint to dry before you apply a 2nd coat, if necessary. This will make the paint last and look great.
- Pick colors that match your wall color perfectly. A slight difference in shade is noticeable, so be careful when selecting paint.
- For an even better finish, feather out the patch edges after each coat of paint dries. This will make an invisible transition between the patch and the wall, so you get a perfect result.
Applying A Finish Coat, If Necessary
To perfect the look of your painting project, you must apply a finish coat. It will make your surface more durable and visually appealing. Here’s how to do it:
- Preparation is key! Clean and dry your painted surface and lightly sand it. Then, wipe it with a soft cloth. This will ensure a smooth finish.
- Pick the right product: Gloss, semi-gloss, satin, or matte finishes – choose according to your needs. Read and understand the manufacturer’s instructions.
- Apply with precision: Use a high-quality brush or roller and work in small sections with long strokes. Don’t overload the brush or roller with paint.
Different surfaces may need different prep and techniques. For example, wood surfaces may need sanding between coats. Follow any additional guidelines from the paint manufacturer or consult a professional if you’re unsure.
Take action today and give your project an extra layer of protection and beauty. Achieve perfection!
Clean-Up And Final Touches
To achieve a polished finish for your plaster wall hole, clean-up and final touches are essential. Removing any excess paint or debris is the first step, followed by inspecting the patched area for any imperfections. These sub-sections provide solutions to ensure a flawless repair job.
Removing Any Excess Paint Or Debris
Scrape away the extra! Use a putty knife or scraper and carefully take away thick layers of paint or junk from surfaces. Be careful not to harm delicate parts.
Once the majority is taken off, get a damp cloth or sponge and wipe down the area. That’ll help remove any leftover bits or particles.
For bigger places with loose junk, like sawdust or dirt, get a vacuum cleaner or broom to clean the space well. Concentrate on corners and tricky spots.
If it’s okay, rinse the area with clean water to remove any cleaning stuff used in the previous steps. This will make sure there aren’t any sticky leftovers.
Check the surface close-up for any bits that were missed in the process. Do touchups if needed and make sure everything looks perfect.
Don’t forget to wear protective gear such as gloves and goggles during the cleaning for safety.
It should be noted that taking off extra paint or debris not only makes it look better but also helps it last longer by preventing possible damage from collected dirt or debris.
A study by The Paint Research Association (PRA) showed that cleaning thoroughly before applying the last touches can significantly improve paint adhesion and durability, leading to longer-lasting finishes.
Inspecting The Patched Area For Any Imperfections
- Visually inspect the patched spot from different perspectives. Check if the texture, color, or height is not the same as the surrounding area.
- Run your fingers gently across the patched area. Notice any roughness, unevenness, or bumps which may mean a bad patch.
- Shine a bright flashlight at a low angle on the patched surface. This will help detect minor flaws that aren’t obvious under normal light.
- Inspect the patched area with enough lighting and critically. Smaller flaws can become visible once paint or finish is applied. Fix any problems found before continuing with the finishing touches.
Tip: Inspect slowly and use tools like sandpaper or putty knives to repair minor problems before the final coating or finish.
Conclusion
To ensure that your repaired plaster wall hole remains in optimal condition, here are final tips and recommendations. Additionally, we’ll provide a concise summary of the step-by-step process you followed to fix the plaster wall holes. This will serve as a handy reference for any future repairs you may encounter.